¶ Setting Reverse DNS in the Clientarea
VPS Customers can use our clientarea to set reverse DNS records for both IPv4 and IPv6 addresses. Reverse DNS records are frequently used in the setup of a mail or DNS server.
Start off by logging into the Clientarea at https://clientarea.freerangecloud.com
Once logged in, you should be presented with an overview of all your active products and services. If you don't see the product list, click on the 'Services' link in the upper right hand side of the menu.
Then, click on the VPS that has the IP addresses you would like to set reverse DNS for.

You will then be presented with the overview screen of your VPS. Click on the 'IP Addresses' tab to be taken to the listing of IP addresses for your VPS.
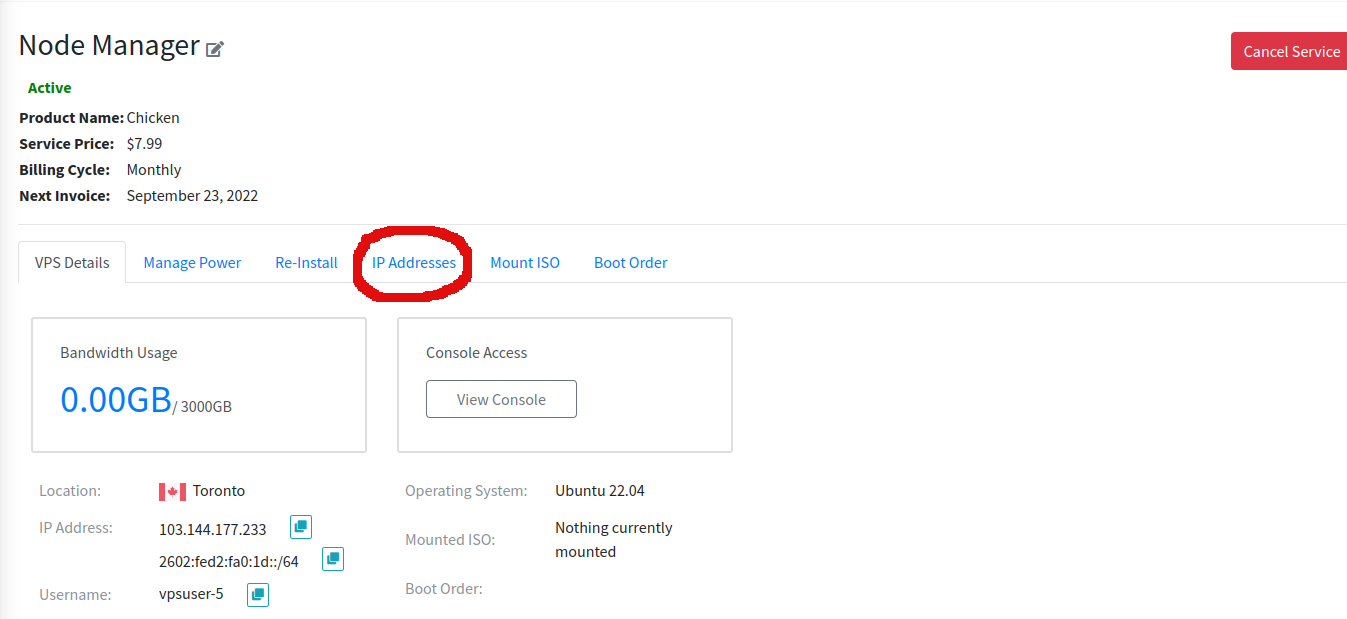
You will see a dropdown menu with a list of all IPv6 and IPv4 addresses assigned to your server. Select an address from the dropdown and press 'submit.'
¶ Setting Reverse DNS for an IPv4 Address
On the next page you will be presented with a text box where you can enter your desired reverse DNS record. By default, the box will display the currently set record.
PLEASE NOTE The record displayed in the text box is subject to DNS caching. It may take up to 48 hours for your changes to be displayed.
Enter your desired record and press the 'Update' button to submit the changes. If you don't see an error the submission was sucessful.
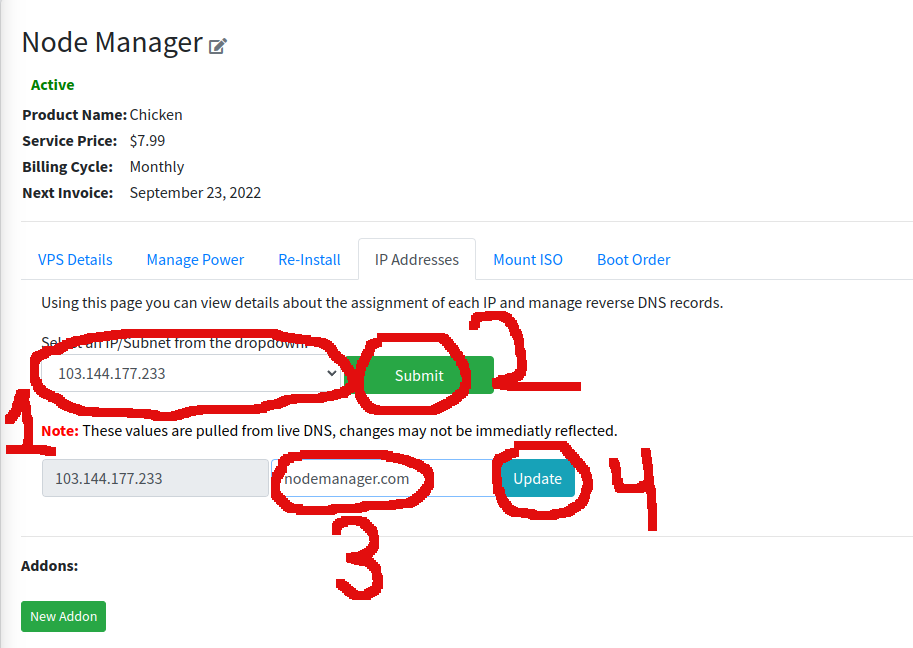
Please wait up to 48 hours for the changes to be processed
¶ Setting Reverse DNS for an IPv6 Address
If you selected an IPv6 subnet the next screen will give you a list of all reverse DNS records within your VPS' IPv6 subnet.
To add a new IPv6 address, place the address in the empty text box at the top of the list. In the second box set your desired hostname. Finally, press the 'add' button to submit the changes.
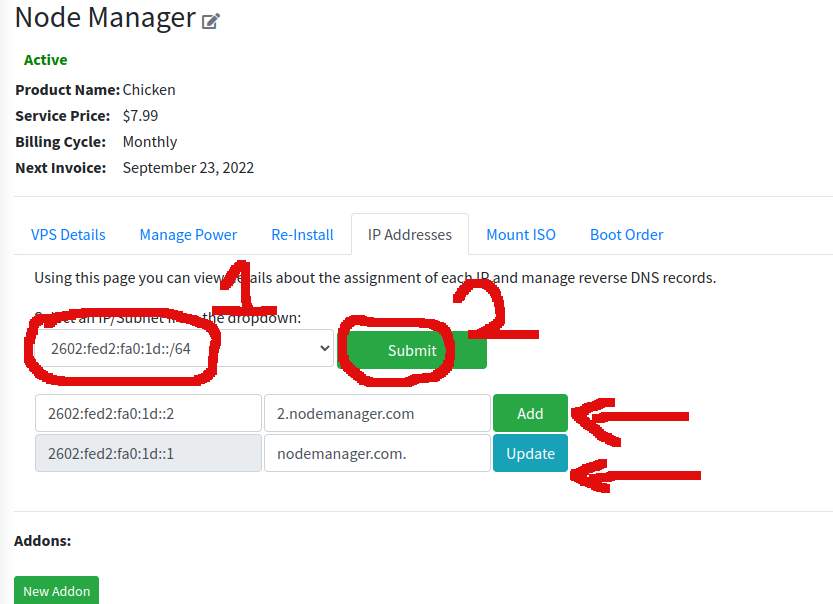
You can only add addresses within your own subnet. Any attempt to add an IP outside the subnet will fail
To modify an existing IPv6 address, change the hostname in the second box and press the 'update' button to submit the changes.
If no error is displayed, the changes were accepted. Please wait up to 48 hours for the changes to become live